Thursday, January 19, 2012

A Few Tomatoes

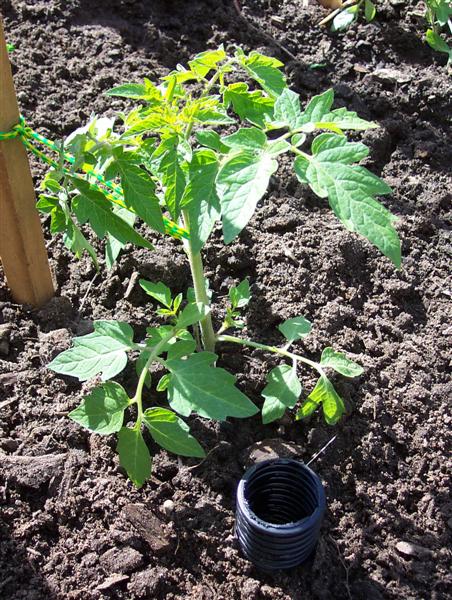
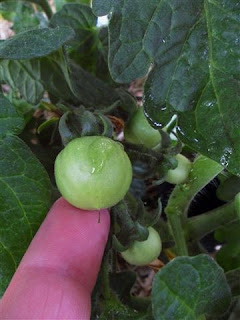
With work commitments following straight on from a year doing my course, I have been neglecting my tomato crop at home, but you have to do what you have to do. Here are some photos taken during the season showing seedlings and fruit.




Sunday, January 15, 2012

Seed Grown Rhubarb

I planted the two seed grown plants this morning that I grew, which are for varieties usually found in the USA and UK., so hopefully they will establish better in the ground. I will be trying for my own seed, but not this year, as they haven't got a sizable crown at this stage that would support the flower. I had terrible germination on the seed for both of these plants, so hopefully when I get to save my own seed, they'll be a bit more viable.


Thursday, December 29, 2011

Some of the Vegies picked so far.

I've been a bit slack posting, but here are some photos to show what we've been picking in recent weeks.


Wednesday, November 30, 2011

Beans - Latest photo

Here's what the Beans look like after the recent rains.

Sunday, November 27, 2011

Growing Beans

Our Beans, both the green Bonaparte and the Butter Beans are growing well.


Sunday, October 9, 2011

Garlic Out - Beans In

After removing the Garlic, I have bulked up the soil with one cubic metre of Mushroom Compost and sowed Bean seed, plus 10 Capsicum/Peppers in its place. It is hoped that sowing Legumes will be fine after having the Rust on the Garlic, so fingers crossed it all works out fine.


I sowed Bonaparte Beans and Butter Beans seed, so it's just a wait and see game now, hoping it all comes up OK. Not much else happening apart from swapping a few tomato plants that looked a bit worse for wear, plus I have sown more tomato seed to use as spare plants if any look like they aren't growing well.

Thursday, September 29, 2011

Garlic Rust

This is as bad as it gets in a vegetable garden situation - so what would you do.

You have about 260-280 maturing Garlic growing in your garden, then about 8-10 weeks out from harvesting, it happens - Garlic Rust, the incurable fungus that strikes certain Alliums.

This week I got to find out what I would do, a decision that was very difficult to make - I removed them, the whole lot and now I'm removing the mulch that surrounded them. I know that I won't be able to grow Garlic here again for at least 3 years, hopefully the spores will only hang around in the ground half that time. What a blow, an absolute waste, but that's how it goes - all in the name of garden hygiene.

I had sourced seed from a Garlic Grower at Red Hill on the Mornington Peninsula, Australian Garlic from the Supermarket and bulbs from Digger's, so if my infection source came in on seed - who do I blame.

A lesson learnt I guess.

Rust on Leaves

Rust on Leaves

Binned Garlic Plants

Monday, September 26, 2011

All Done

This morning I tied the plants to the cages to stop any wind damage, then I put on a good layer of Sugar Cane mulch then pruned, labeled and watered. All I need do now is to give them a regular watering and wait for the fruit to grow, how easy does it get.


The last six tomato plants were 'squeezed in' after this shot was taken, so I now have 21 plants in this caged area, while 17 plants take up the area I have the determinate (short) tomatoes in plus Jan's 2 Cherry tomato plants which I don't look after.. Now to plant the Gogosari Peppers.

Sunday, September 25, 2011

What's in the planting holes?

Here's something for your garden, it's the most effective way to water your plants, especially Tomatoes, as they feed close to the surface, but actually get water deeper down. This places it where its needed. You need to get the slotted aggie pipe as shown, the cut it about 45cm for a tomato or shorter for smaller plants. When you dig the hole, you put the pipe in, then plant over it, leaving a little stick out of the ground in case you mulch. For discussion on this, or any helpful advice on gardening, join up on www.ozgrow.com - I recommend it.

Here's how the slotted aggi pipe looks when fitted beneath the tomato plant - a great idea for deep watering the tomato plants - which they absolutely love when it gets hotter.

Slotted Aggi Pipe

A 45-50cm length of pipe fitted beneath a tomato plant.

The cut tubes

Saturday, September 24, 2011

Tomatoes Planted Today

I planted out more of the tomato plants today, but still have just a few more to go.

Here's where I'm up to at the moment, with these varieties planted in my caged area so far:-

Black Cherry
Ozgrow Cherry
Malakhitovaya Shkatulka
Chocolate Stripes
Nicoleta
Morado
Latah
Giant Belgium
Greek Witness
Yellow Kotlas (RL)
Grandfather Ashlock

The plants were planted a bit deeper with the cotyledons and the three leaves above them removed. In the hole was a mix of A&C, Potash and Tomato & Vegetable Fertiliser. Once the plants were in the ground, they got some Epsom Salts as well as a good watering in.

Monday, September 19, 2011

Salted Tomatoes

I have now got 4 x Little Heart tomato plants growing in the ground and I'll soon start a little experiment on two of them to see what difference if any, dosing them with Epsom Salts makes. I have two in cages and two staked, so the two in cages will get the treatment.

I'll post photos here of the tomato plants when I start this 'test'.

Sunday, September 18, 2011

Who Dares Wins

I guess if you don't give it a go, you'll never know.

That's what I was thinking when I planted out 17 of my 'Determinate' tomato seedlings today and to be truthful, this Spring weather is too good to pass up on and the plants may as well be taking advantage of it. One thing I've learnt with doing my Horticulture Course is that you have to 'think standing up' and not follow leads that others set. Don't follow what I do here as it may not work for you, as I take risks and have been lucky - so far.

What are in the ground so far are:-

4 x Little Heart
4 x Totem
3 x First in the Field
2 x Caro Rich
2 x Sprite
2 x Siletz

Wind and Frost is all I have to worry about now. Here are a some photos to show the Mulch going down, but it has a couple of things under it as a 'back up' for the season.

Some A & C added along with some Potash

Next some Sugar Cane Mulch

Finished product.

Wednesday, September 14, 2011

Perfect Score -Again

Well, I got my Weeds Assignment back today after being marked and another perfect score - 100% the result. Wow.!!!!

I do have my fingers crossed for a good result with my 'Pests & Diseases' Assignment as it took the longest to do as consists of 91 pages in total.


Saturday, September 10, 2011

New Rhubarb

I have a new seed grown Rhubarb with the variety name of Timperley Early, from the U.K. It's a green and red stem, so I won't know for a while how it tastes, but I'll grow it anyway.

Here's a photo of it today.

More Tomato Photo's

Here area some more tomato photo from this season.


How to Tell Your Tomato's Leaf Type

Here's how to tell if your seedlings are Potato Leaf or Regular Leaf at an early stage. If you look at the top photo at the leaf on the right, you'll see it is a Potato Leaf, with smooth margins, then if you look at the lower photo you will see the toothed margin of the Regular Leaf.

Potato Leaf
Regular Leaf

Some of My Babies

Yes, I have been slack and not posted more about my tomato plants, but I have been busy with other things, so I do have an excuse. Here are the latest babies in the hothouse to start with, then I'll post other photos later to keep you updated.

Micro TomVillage Red
Whippersnapper
Fargo
Vodar
Striped German